Welcome to Mission Critical Email’s Guide to Using Zimbra Connect!
Zimbra Connect provides text and video chat, screen sharing and other features right from within Zimbra’s web interface. For the best experience, please use Firefox.
Through May 2020, we are providing all of Connect’s Advanced features, including video chat, free to our Hosting customers, to help make working from home easier and more human during these difficult times.
The following sections will introduce you to Connect’s features and how to use them.
Quick Access Sidebar
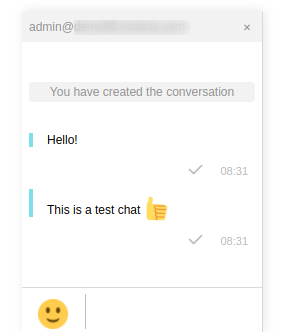
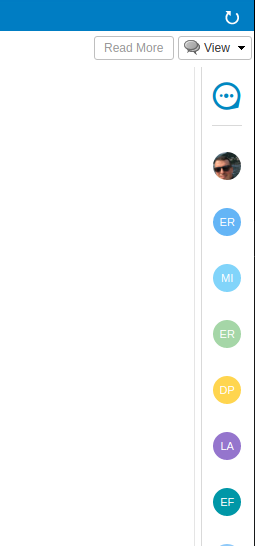
The Quick Access Sidebar displays the last people, groups, and channels the user has interacted with and allows to open a quick chat window with all of those.
It is available for both “Basic” users and “Advanced” users and provides additional features for the latter.
Connect Tab
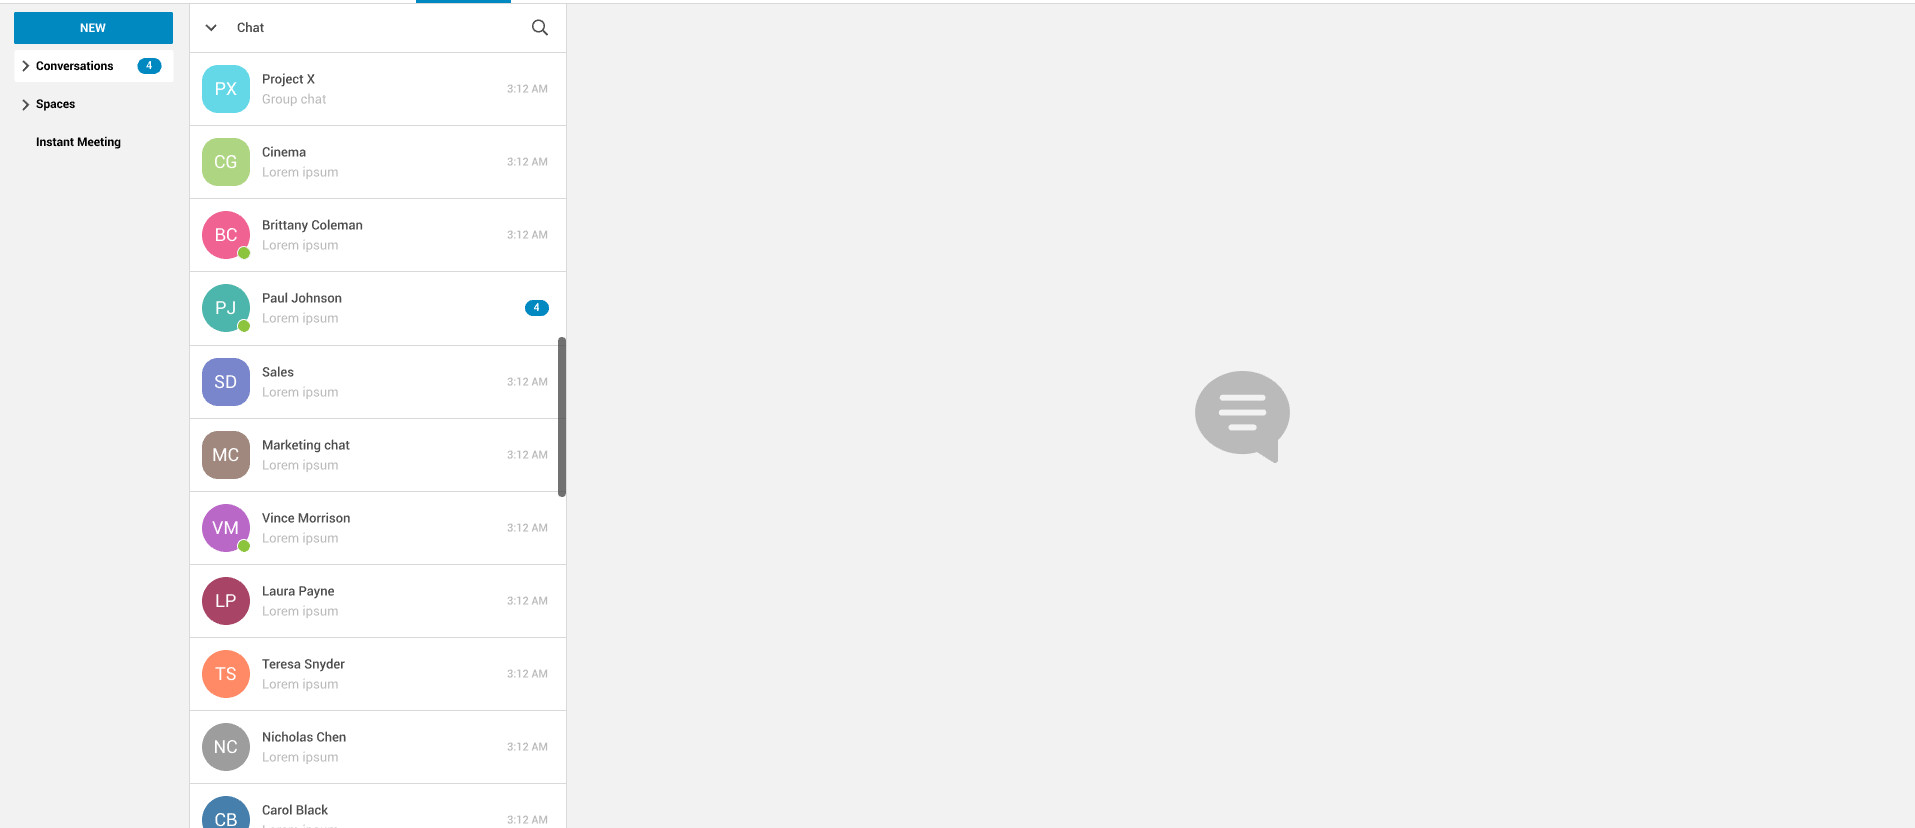
The Connect Tab is a fully-fledged Zimbra feature tab that behaves similarly to all other feature tabs (e.g., Mail or Calendar).
Instant Messaging and Corporate Communication
1-to-1 chat
One-to-one Chats can start from either the Quick Access Sidebar or the Connect Tab:
- on the former, select one of the available entries (based on your chat history) and start chatting with that person right away
- on the latter click on “New,” then “New Chat” and select the person you want to chat with from the GAL
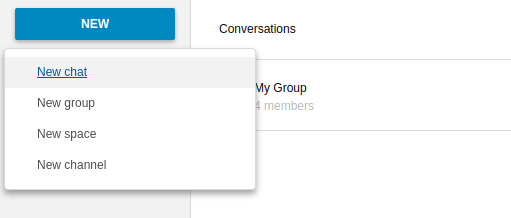
Recent 1-to-1 chats appear in the “Conversations” section of the Connect Tab and the Quick Access Sidebar (round icon).
Groups
Groups are how users communicate with multiple people at the same time (by default up to 5 total). Those are non-persistent entities not tied to any specific space. Any user can create a group inviting people, and any group member can invite more people in the same way. When all users leave a group, the group itself ceases to exist.
Groups Features
- A user in a Group can add more users to the Group itself up to the allowed limit.
- A user in a Group can chat with all of the others. All members of that Group can view all messages sent to the Group.
- A user in a Group can send files to all of the others. Files sent in a Group are available to all members of that Group.
- An user in a Group can start a video chat with all of the others. Group video chats can be joined at any time by all members of the Group.
Global Administrators can change the allowed maximum number of group members in the Zimbra Connect section of the Global Settings in the Admin Console.
Groups UI
Recent Group chats appear in the “Conversations” section of the Connect Tab and the Quick Access Sidebar (rounded square icon).
- Creating a Group
To create a new Group, click on the “New” button in the Connect Tab, and select “New Group.”
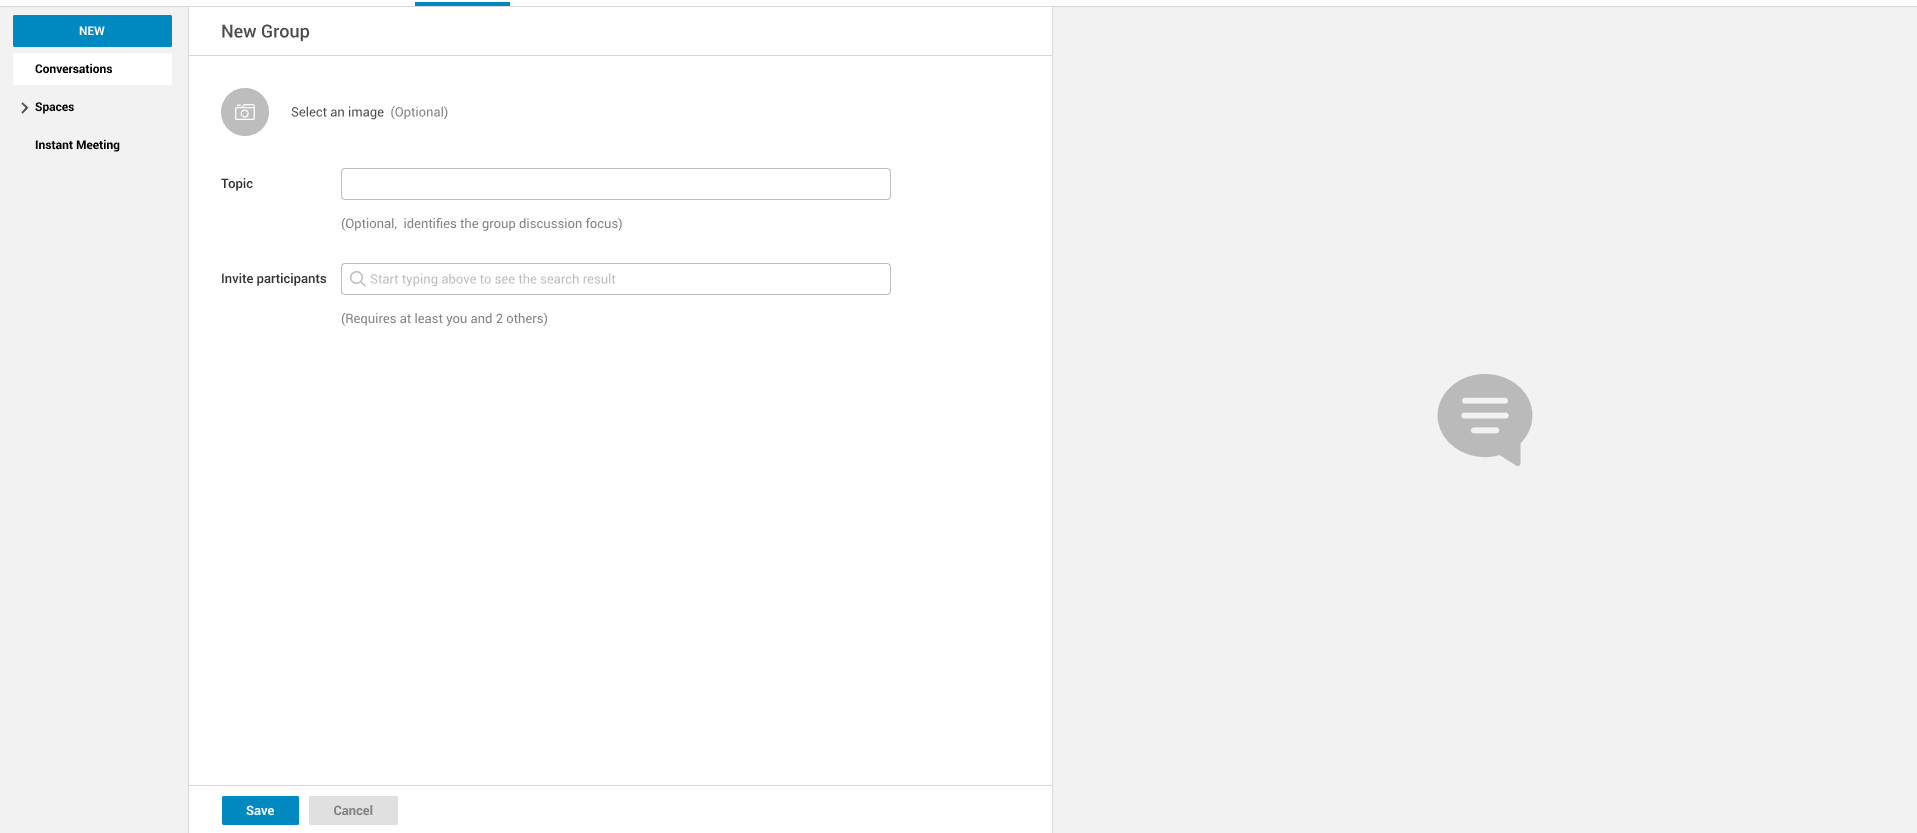
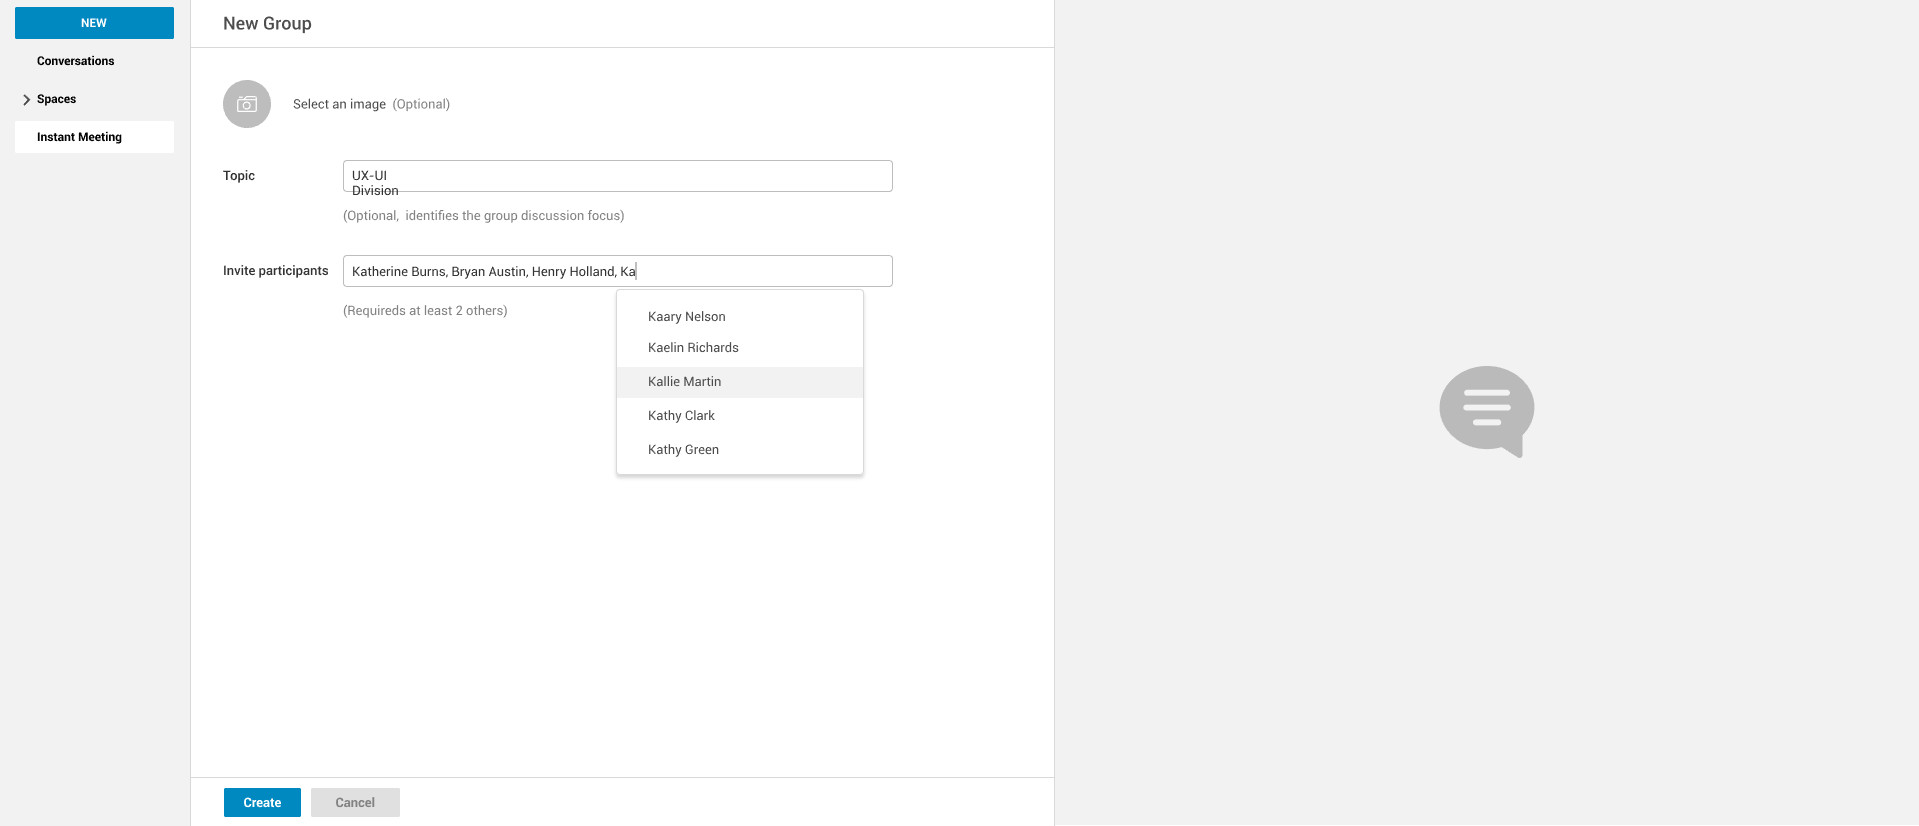
then, add the Group’s title, select the buddies you wish to invite and click on “Create.”
- Inviting a participant to a Group
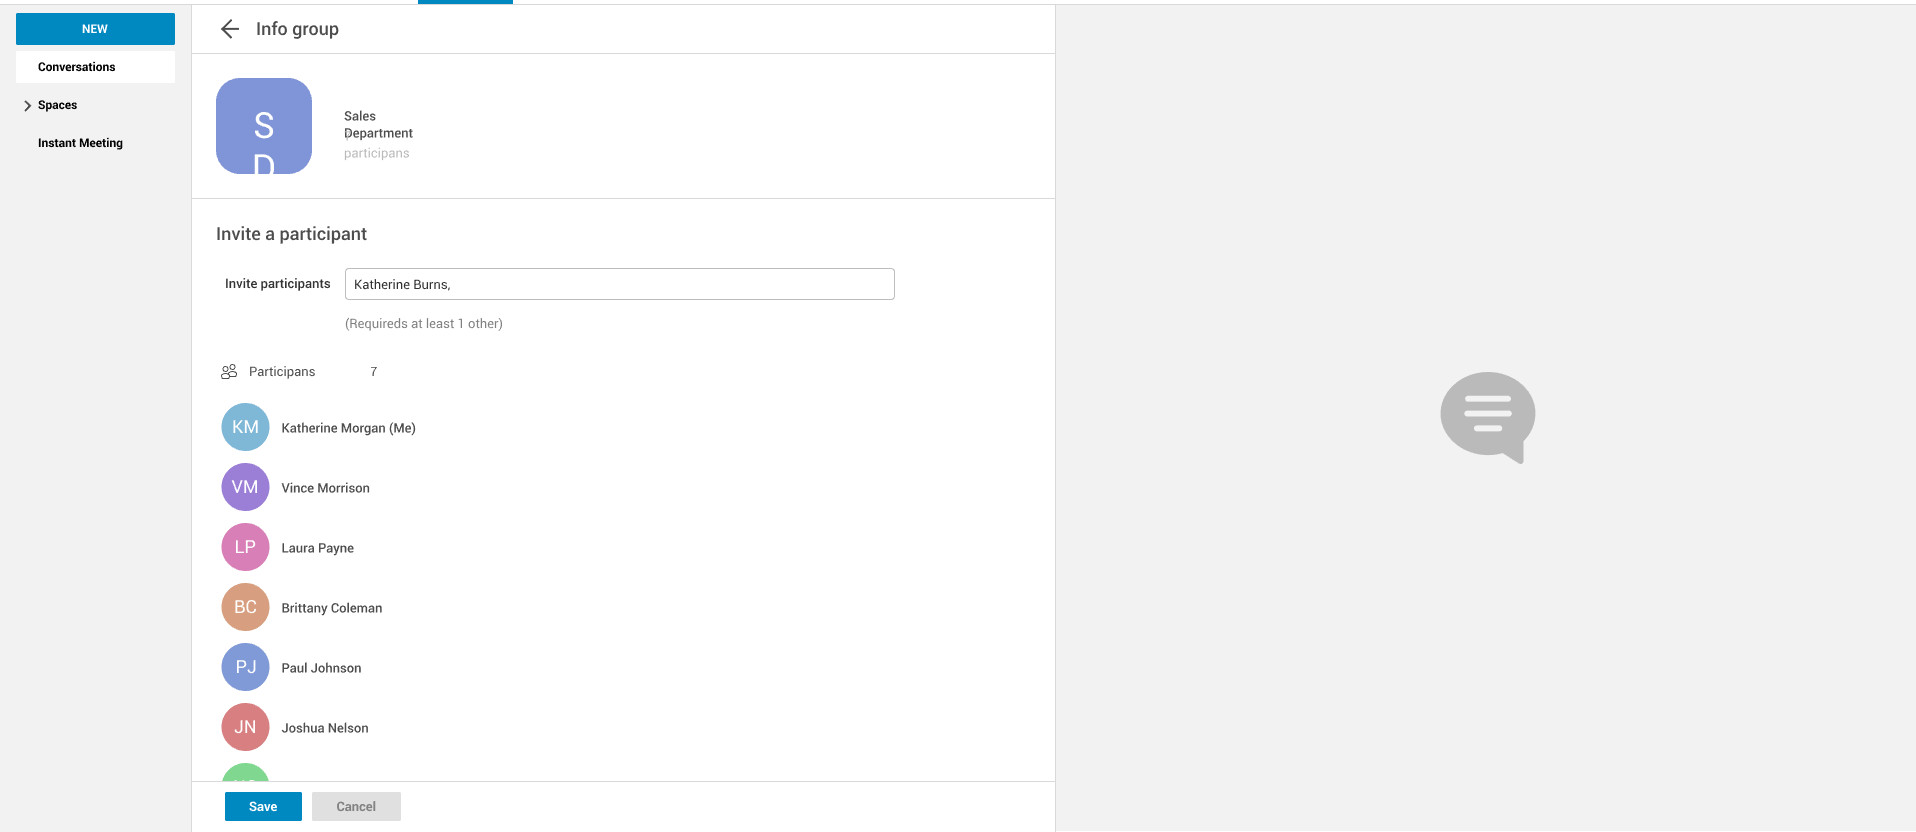
To invite one or more buddies to a Group expand the Group’s Info, select the users to be added and click on “Save.”
- Starting a Group Video Chat
To start a Group video chat, click on the “Camera” icon on the top of the Group’s chat window.

Any member of the Group can join the call at any time by clicking on the same button.
- Leaving a Group
To leave a Group, first, click on “Leave Group” in the Group’s Info
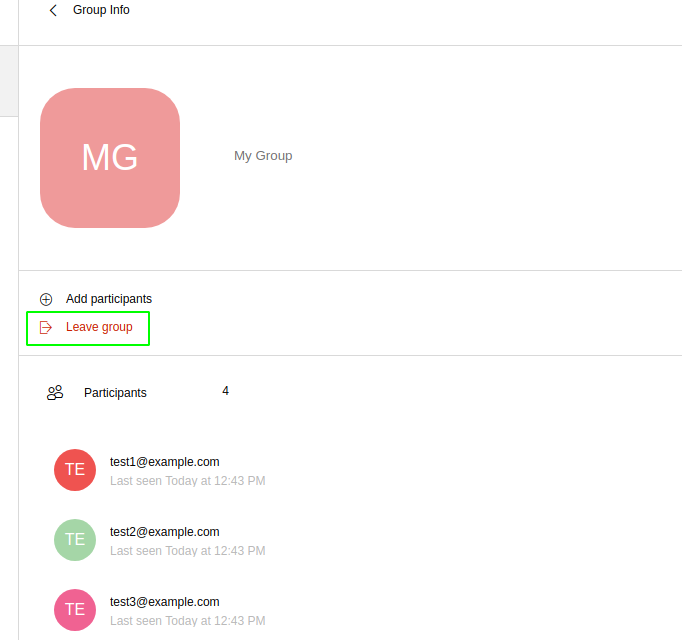
then, click on “Yes” under the warning message.

Spaces
Spaces are a themed container that can hold any number of Channels. Think of a Space as a community center where people gather to discuss different topics in dedicated areas (named Channels).
Spaces Features
- Each space has a unique name and topic. You may change both the name and the Topic by clicking on the relevant field in the Space’s settings.
- Members can leave a space at any time.
- Space Administrators can create new channels and invite new people to the space using the appropriate buttons.
Spaces UI
Spaces appear in a dedicated section of the Connect Tab, which gives access to all Space-related features:
- Creating a Space
To create a new Space, click on the “New” button in the Connect Tab, and select “New Space.”
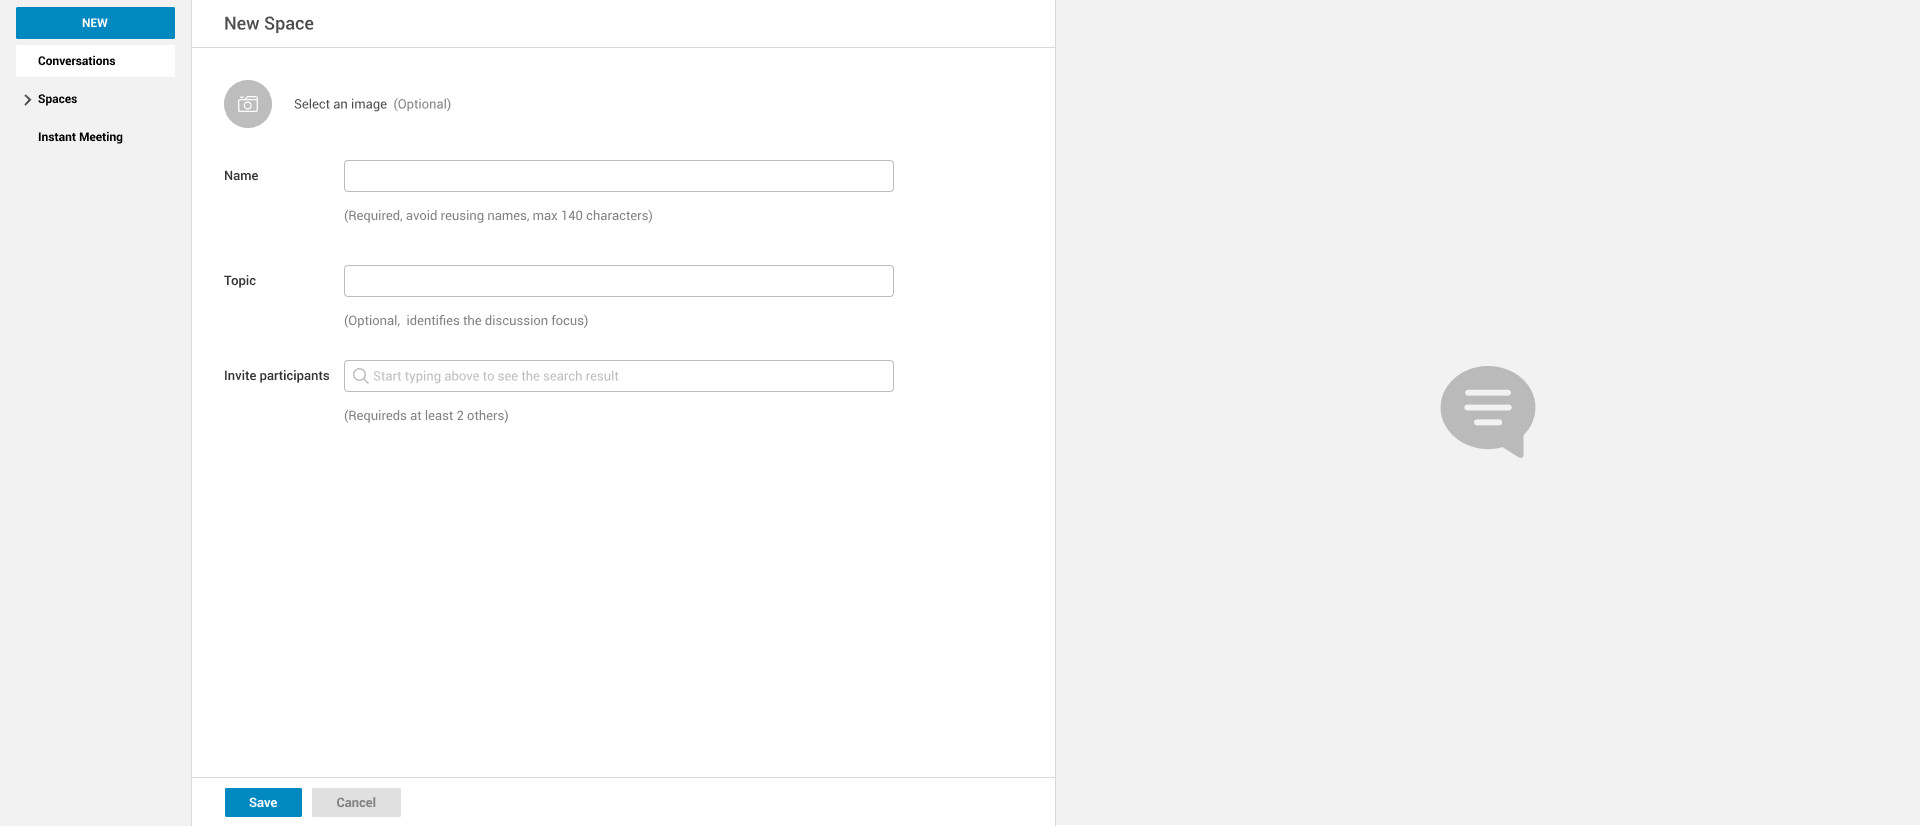
then, enter the Space’s name and topic, select any users to invite and finally, click on “Save.”
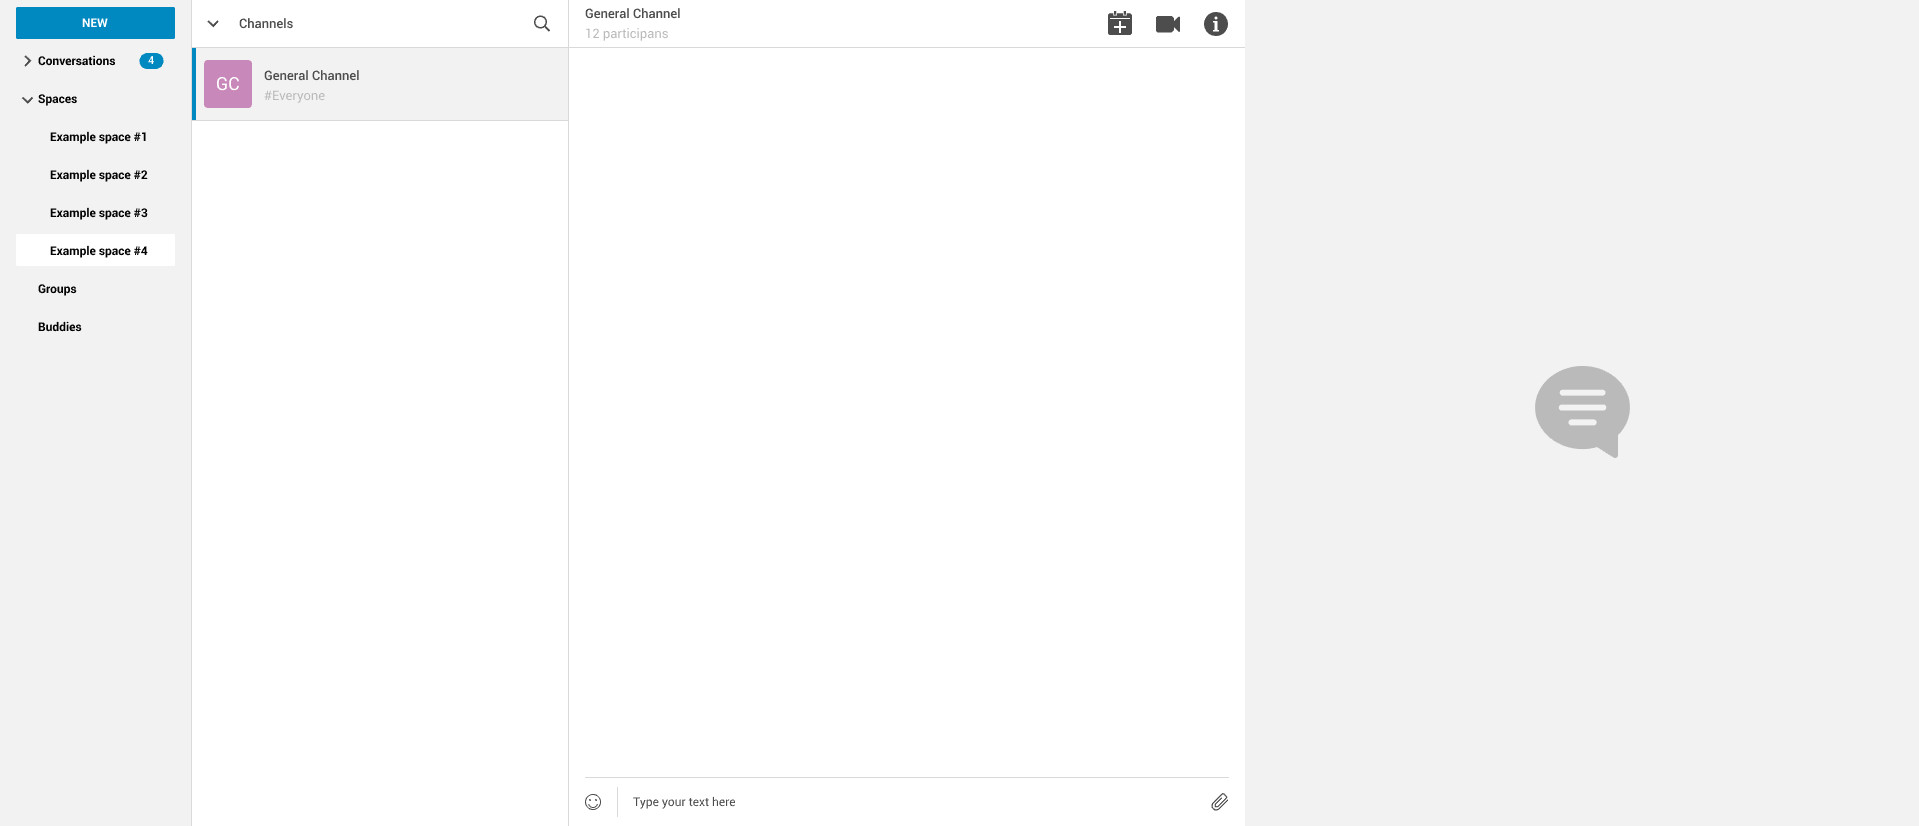
- Leaving a Space
To leave a Space, click on the “Leave Space” in the Space’s General Channel Info.
Participants can leave a space at any time, while a Space Administrator can only leave a space if there is at least one other Space Administrator.
Both need to be invited to join the space again, and former Space Administrators get invited as regular participants but can be granted Administrator rights again.
Space Settings
The General Channel Info in each Space defines its settings (see below).
The Space’s creator is also the first Space Administrator and can grant the same rights to any other user by clicking on the crown icon in the appropriate entry of the participant list.
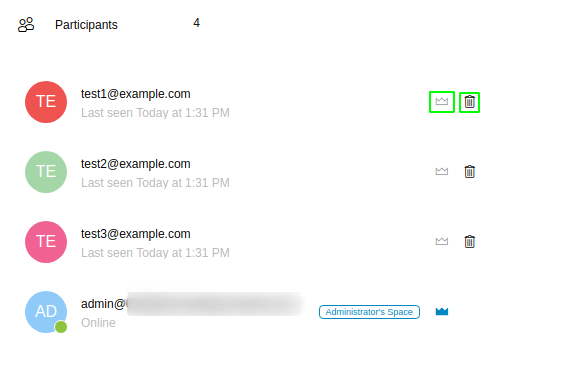
Only Space Administrators can invite new participants, create new channels, kick people, and delete channels within the space.
Channels
Channels are topic-defined areas inside of the same space. Those can contain any number of users, and unlike Groups, users can autonomously join any Channel in a Space they are in instead of being invited to it by a member.
Each new Space has a “General” channel automatically created within it, which defines the space’s properties (e.g., Title and Topic) and which all users automatically join when they join the Space.
Channels Features
- A user in a Channel can chat with all of the others. All members of that channel can view all messages sent on the Channel.
- A user in a Channel can start a video chat with all of the others. Channel video chats can be joined at any time by all members of the Channel.
Channnels UI
Channels appear in Spaces within the Connect Tab, and all of the Channel-related features are managed there, by:
- Creating a Channel
To create a new Channel, click on the “New” button, and select “New Channel.”
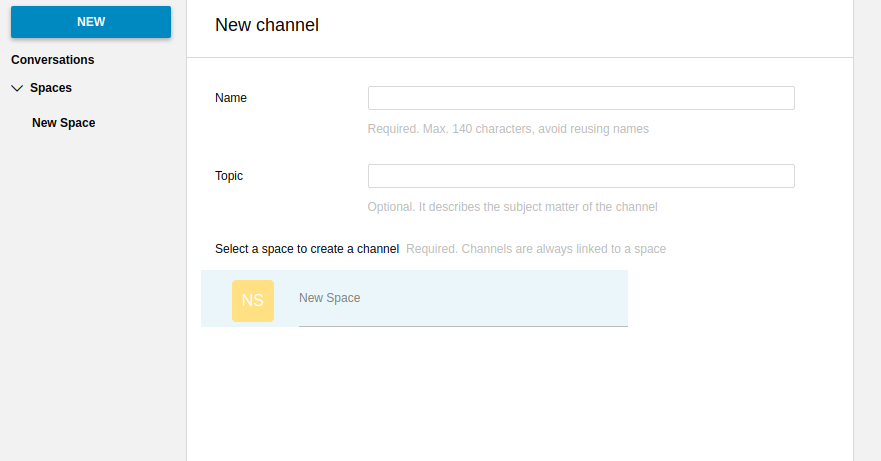
then select:
- the Space that should contain the Channel (mandatory)
- the Channel’s name (mandatory)
- the Channel’s topic (optional)
finally, click on “Save.”
- Joining a Channel
To join a Channel, click on the Channel label and then on “Join Channel.”
- Starting a Channel video chat
To start a Channel video chat, click on the “Camera” icon on the Channel’s chat window.

Any member of the Channel can join the call at any time by clicking on the same button.
- Leaving a Channel
To leave a Channel, first, click on the red “Leave Channel” entry in the Channel’s Info
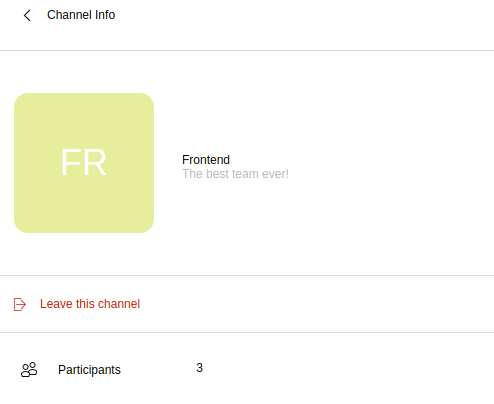
Both normal users and Space Admins can leave a channel at any time and join it afterward.
File sharing
Users can easily share files via Connect to Chats and Groups by dragging and dropping the files directly into the chat interface (both in the minichat and in the Connect tab) or by clicking the “paperclip” icon on the right of the message input field. Multiple files can be uploaded at once, and image files will show a preview of the file while other common filetypes will display a custom icon.
Clicking on a file within a chat window will download it to the local client using the browser’s own download interface.
Files shared via Connect will be stored inside a protected root folder on the sender’s Drive called Connect sent files, thus counting towards the sender’s mailbox quota, and will remain available for download in the chat window for all participants until deleted from Drive by the sender.
Video Chat
Video Chat features are available in 1-to-1 chats, Groups, and Channels, allowing multiple people to communicate in real-time using a webcam and a headset, as well as allowing them to share their screen with all other attendees.
The WebRTC protocol is the foundation for this feature. WebRTC is a peer-to-peer auto-adaptive technology that allows clients to communicate directly without overloading the server. Call quality is automatically tweaked based on the available bandwidth, with the maximum quality being Full HD for both video and audio. When starting their first video chat, users need to grant their browser access permissions to their camera and microphone.
Video Chat UI

The video chat UI has three main areas:
- The center displays video streams with a single (main) stream on the top and multiple secondary streams on the bottom. The total number depends on the screen’s resolution and window size.
- On the left is the Group’s or Channel’s instant messaging chat. This chat is visible and entirely usable, and its history gets retained in the group’s or channel’s chat history.
- On the bottom left appear the user’s video feed and controls (disable video, mute microphone, and share screen).
Users can disconnect from an ongoing video chat by pressing the “Hang up” button in their video stream’s frame on the bottom left of the screen. Whenever a video chat is on, users belonging to the Group or Channel of the video chat see a “Call in progress” message below the name of the Group or Channel and may join by clicking on the “Camera” icon in the chat.
Video Stream Control
Video streams are displayed in a “first come, first served” basis according to the connection order between the peers.
Every participant can mute their audio stream or stop their video stream.
Screen Sharing
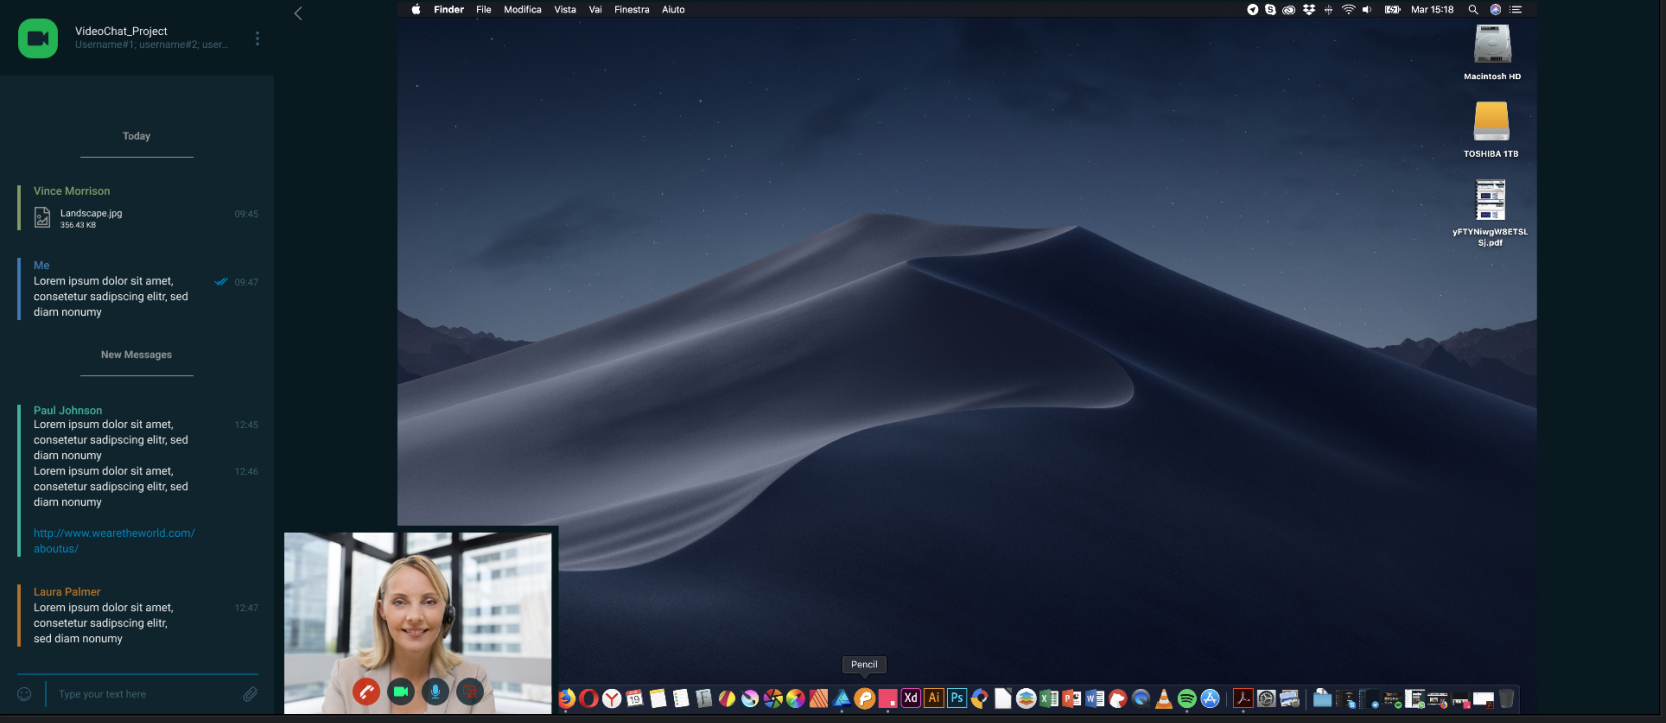
When clicking on the Screen Share button, a pop-up window appears asking the user whether to share their entire screen or just a specific window. After choosing, the screen sharing feed replaces the user’s webcam feed for all participants.
Instant Meetings
Instant Meetings are one-shot Video Chats that can be attended by external users as well as internal users. Only users with the Advanced Connect features enabled can start Instant Meetings, but any internal or external user can attend.
To create an Instant Meeting, click on the “New” button in the Connect Tab, and select Instant Meeting.
Then, fill in the attendee list by entering any internal or external email address in the text box and pressing enter to add it to the list. Once all attendees are added, press “Save” to send an email notification to all participants and start the Instant Meeting.
Instant Meeting URLs
Both external and internal users can join an Instant Meetings through a dedicated URL that can be found both in the invitation email and in the information section of the Instant Meeting itself.
Such URLs are uniquely generated for each Instant Meeting and expire 10 minutes after the host leaves the meeting.
Instant Meeting UI
The Instant Meeting feature uses the very same UI as any internal Video Chat session.
Presence
Presence is managed automatically in Zimbra Connect: whenever a user logs in, regardless of whether the Connect Tab has the focus, they appear as online.
As part of the user presence system, all messages get displayed with a variable number of check symbols: 
- 0 checks, message not delivered to the server
- 1 check, message delivered to the server
- 2 checks, message viewed by all users
Unread Messages
The number of unread messages in any conversation, Group or Channel appears on the right side of the conversation, Group, or Channel.
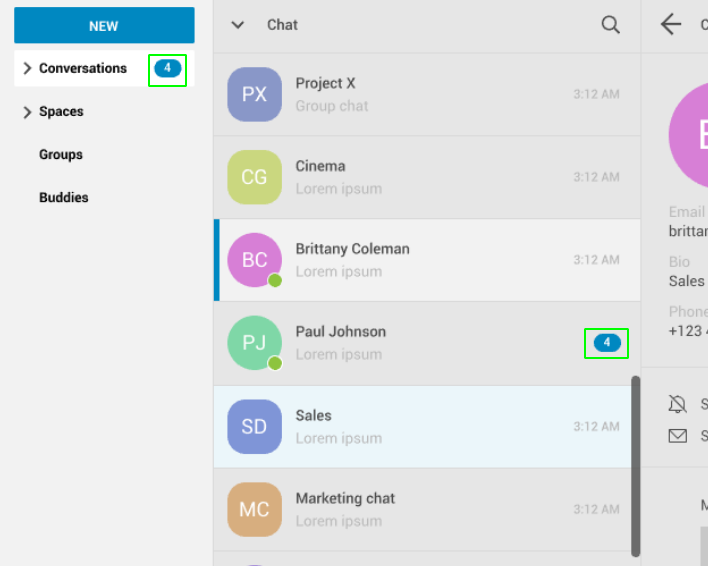
Chat History
Chat History for each 1-to-1 Chat, Group, and Channel is available in the very same window (e.g., enter a Channel to see all of that channel’s history) and messages delivered to offline users appear in the appropriate IM conversation, Group or Channel.
If you have any questions, just fill out the form!

